
Adding a Notification Service Extension
This guide shows you how to add a notification service extension to your project to support rich push notifications.
iOS applications have the ability to send big images, audio and video via push notifications.
This guide shows you how to add the notification service extension to your Xcode project.
Prerequisites
You must have installed WonderPush in your Xcode project already. If you've followed the iOS Quickstart guide, you should be all set and the notification service extension should already be present in your project.
If you've installed WonderPush via a wrapper such as Apache Cordova or Ionic, there's chances the notification service extension is not in your project yet.
If you are migrating from another push provider, there's chances you already have a push notification extension. If that case, locate it and remove it.
You can easily find out if your project already contains a notification service extension:
- Open your Xcode project
- In the project navigator, click the project name
- Choose the General tab
- Look for an entry in the TARGETS section that has the extension symbol (an
E)

Example of existing notification service extension
If you can't find a notification service extension, follow the rest of this guide.
Step 1. Create the notification service extension
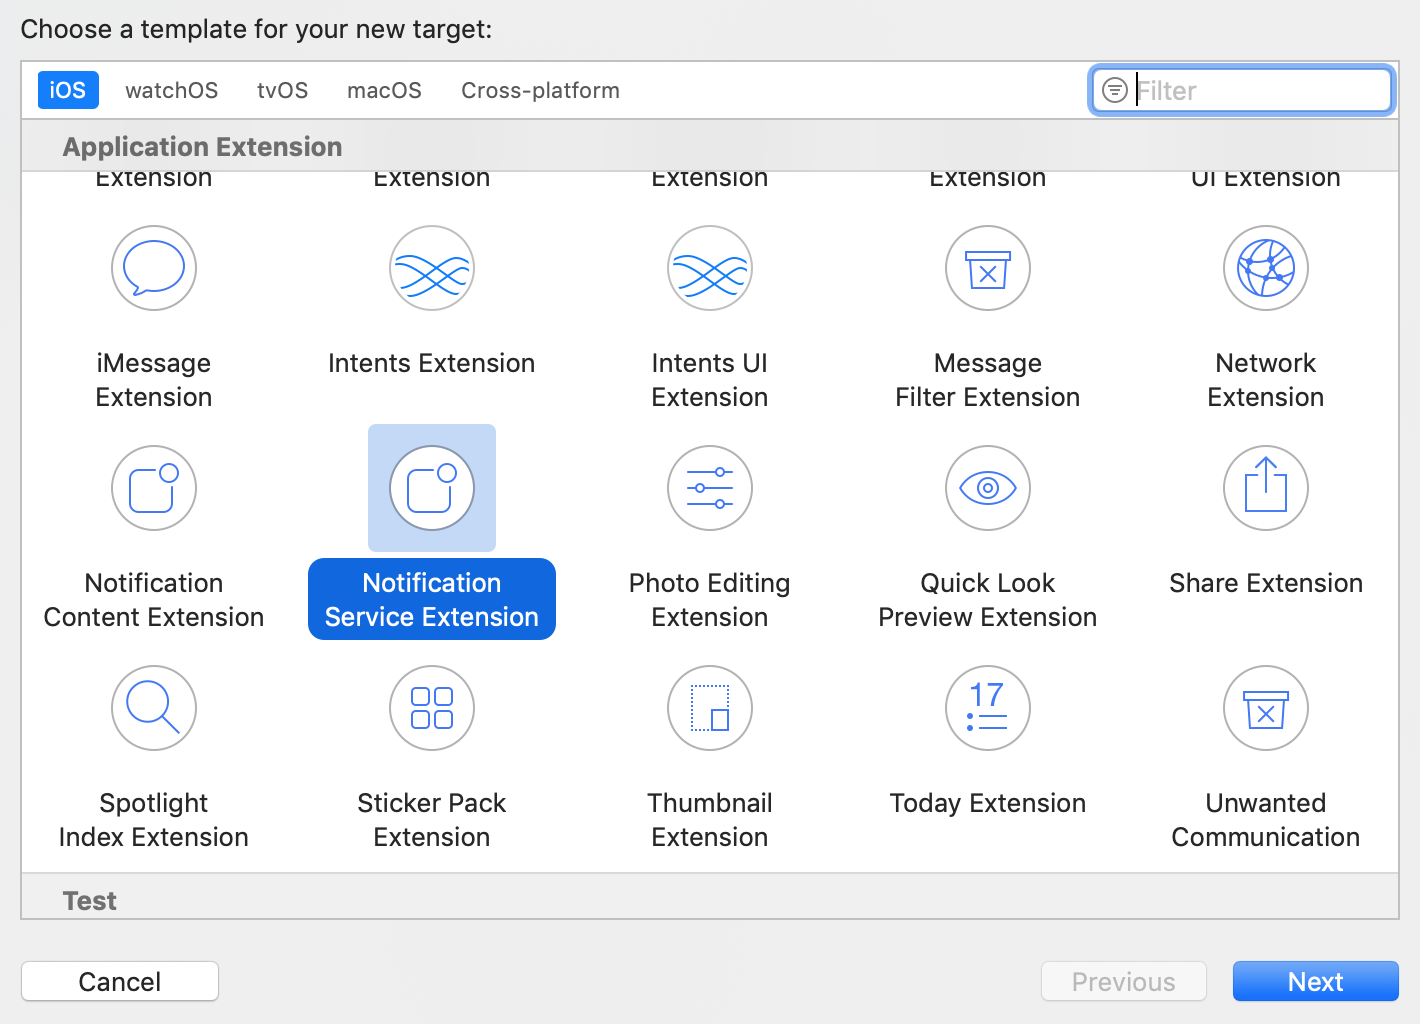
In Xcode, select File / New / Target..., and choose Notification Service Extension:
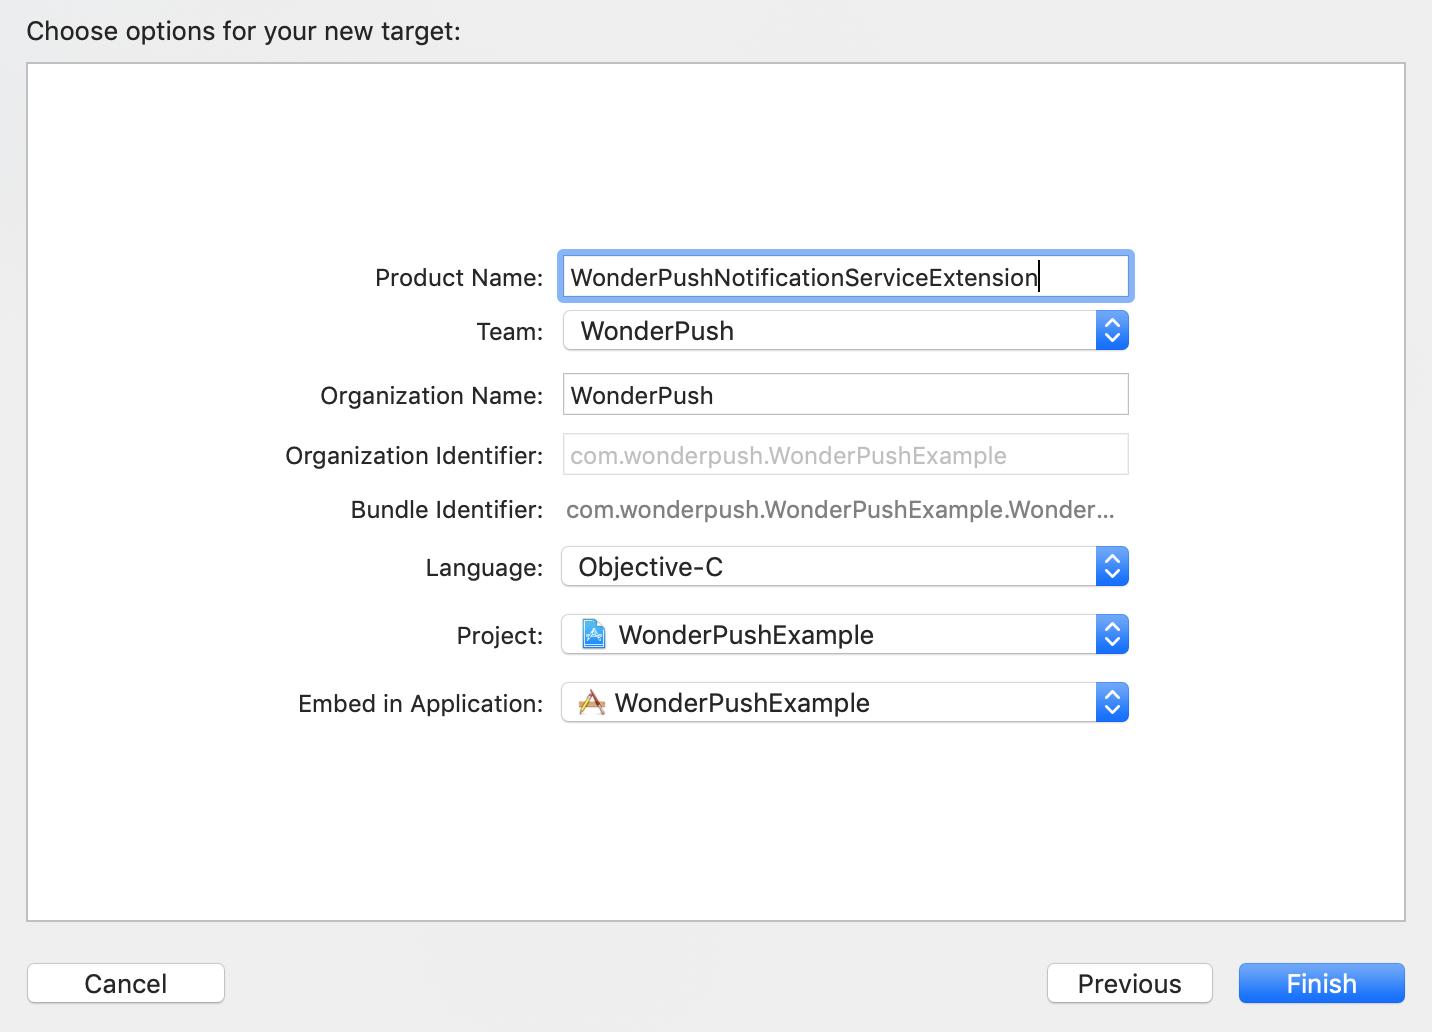
Enter WonderPushNotificationServiceExtension as the name for your new target:
When Xcode prompts you to activate the new scheme, answer Cancel to keep Xcode building and debugging your app instead of the extension:
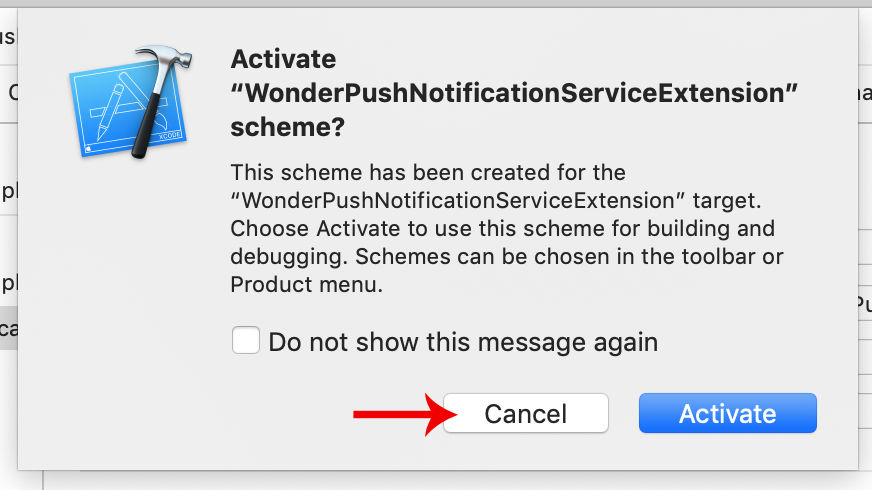
If you activate by mistake, switch back to your app's scheme from the dropdown menu located next to the play button.
Set the Deployment Target of your Notification Service Extension to 11.0 (or the minimum version accepted by Xcode):

Step 2. Add required code
Modify the code of the Notification Service Extension to replace the whole contents of NotificationService.swift or (NotificationService.h and NotificationService.m for Objective-C) with :
import WonderPushExtension

class NotificationService: WPNotificationServiceExtension {

    override class func clientId() -> String {
        return "YOUR_CLIENT_ID"
    }

    override class func clientSecret() -> String {
        return "YOUR_CLIENT_SECRET"
    }

}
#import <WonderPushExtension/WonderPushExtension.h>
@interface NotificationService : WPNotificationServiceExtension
@end#import "NotificationService.h"
@implementation NotificationService
+ (NSString *)clientId {
return @"YOUR_CLIENT_ID";
}
+ (NSString *)clientSecret {
return @"YOUR_CLIENT_SECRET";
}
@endStep 3. Add a dependency to WonderPushExtension
If you're using CocoaPods, make sure your Podfile contains:
target 'WonderPushNotificationServiceExtension' do
  platform :ios, '11.0'
  # Comment the next line if you're not using Swift and don't want to use dynamic frameworks
  use_frameworks!

  # Pods for WonderPushNotificationServiceExtension
  pod 'WonderPushExtension', '~> 4.0'
end
If you're adding WonderPush frameworks manually, follow the steps described here, and if you're using Carthage, follow these steps.
That's it! You should be all set to receive Rich media!
Updated about 1 year ago