OneSignal Android apps
Step-by-step instructions to migrate your Android app from OneSignal to WonderPush
Migrating to WonderPush is easy: all you have to do is add WonderPush to your app and publish a new version to Google Play.Users that install this new version can be reached via WonderPush and the others via OneSignal without risking to send duplicate messages.
This guide will help you remove OneSignal from your app and add WonderPush.
WonderPush and OneSignal SDKs expect different push notification formats, so importing your Android push tokens into WonderPush is not very useful. Instead, just let users install the new version of your app and automatically migrate to WonderPush.
Shipping WonderPush in a new version of your app
Step 1. Removing OneSignal gradle entries
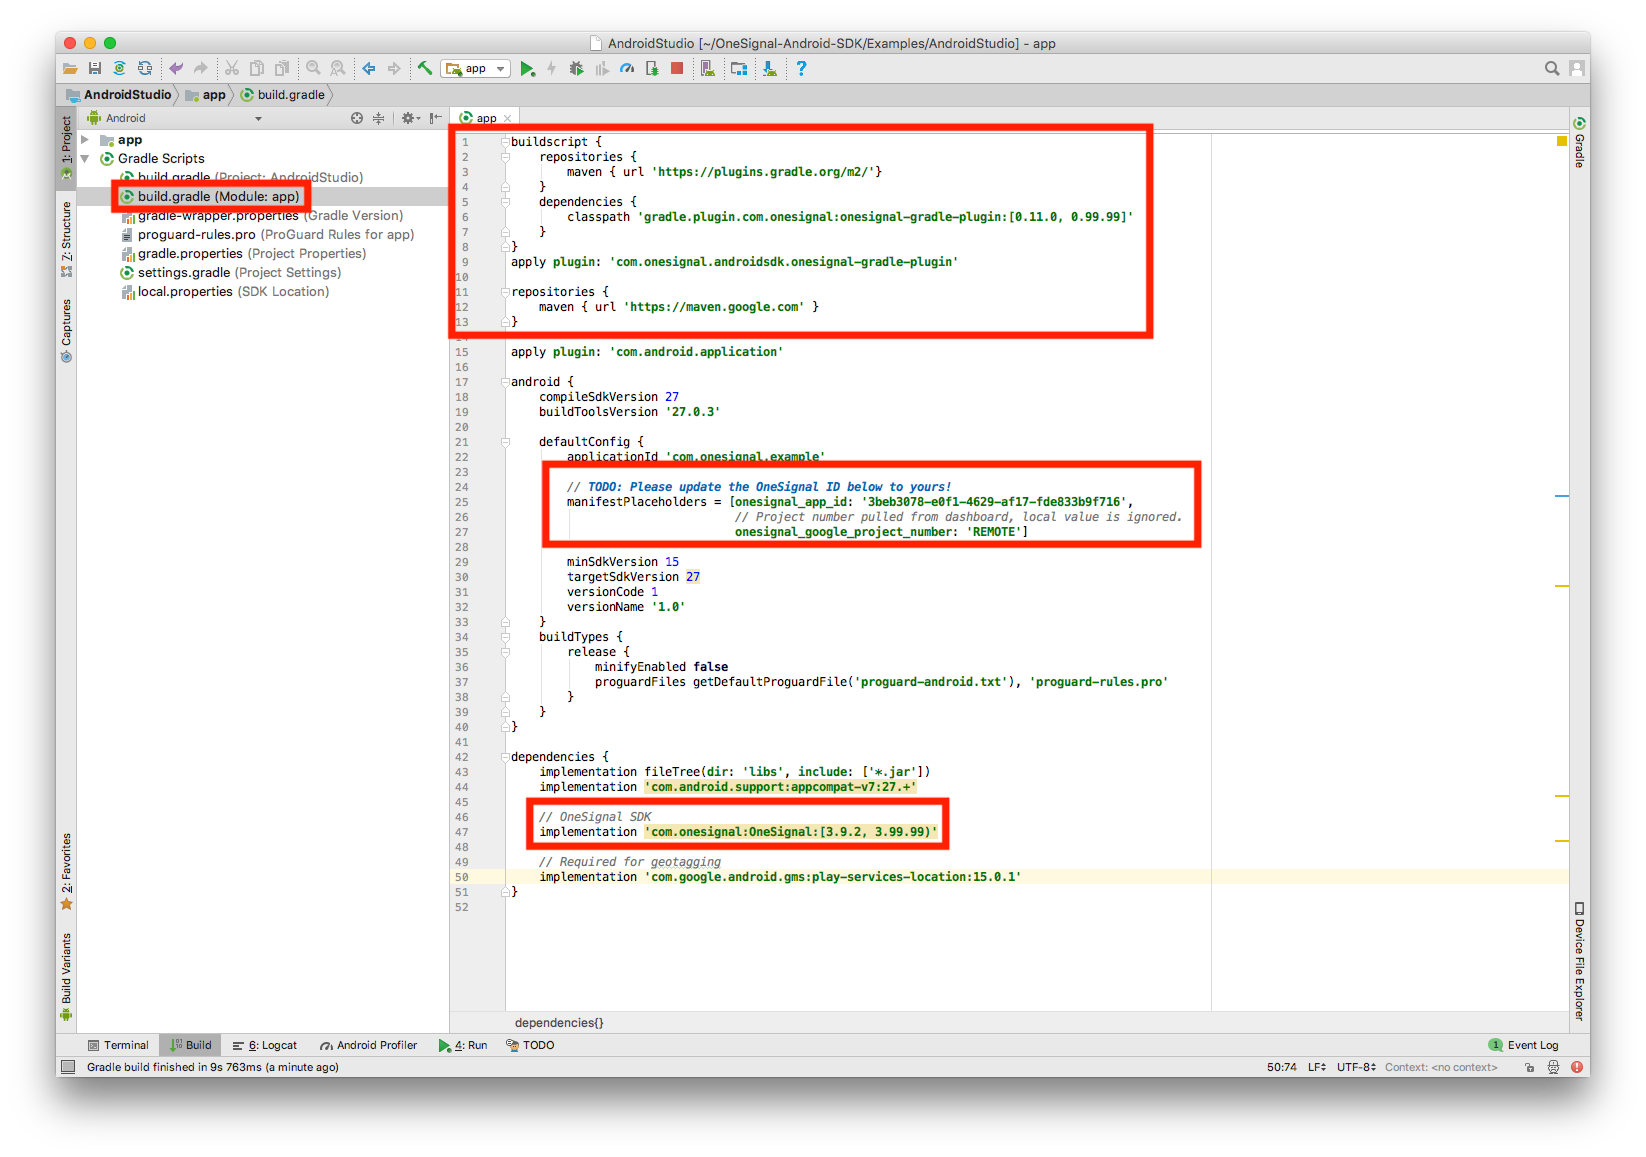
Open your app/build.gradle and remove the 3 sections you added during the OneSignal setup.

Remove this entire section at the top of your app/build.gradle:
buildscript {
    repositories {
        maven { url 'https://plugins.gradle.org/m2/'}
    }
    dependencies {
        classpath 'gradle.plugin.com.onesignal:onesignal-gradle-plugin:[0.11.0, 0.99.99]'
    }
}
apply plugin: 'com.onesignal.androidsdk.onesignal-gradle-plugin'

repositories {
    maven { url 'https://maven.google.com' }
}
Remove the implementation line below from your dependencies
dependencies {
    implementation 'com.onesignal:OneSignal:[3.9.1, 3.99.99]'
}
Remove the manifestPlaceholders entry from the defaultConfig section:
android {
   defaultConfig {
      manifestPlaceholders = [
          onesignal_app_id: 'PUT YOUR ONESIGNAL APP ID HERE',
          // Project number pulled from dashboard, local value is ignored.
          onesignal_google_project_number: 'REMOTE'
      ]
    }
 }
Step 2. Remove OneSignal code from your app
Open your ApplicationClass and remove the OneSignal initialization snippet:
import com.onesignal.OneSignal;

public class YourAppClass extends Application {
   @Override
   public void onCreate() {
      super.onCreate();

      // Remove this: OneSignal Initialization
      OneSignal.startInit(this)
        .inFocusDisplaying(OneSignal.OSInFocusDisplayOption.Notification)
        .unsubscribeWhenNotificationsAreDisabled(true)
        .init();
   }
}
import com.onesignal.OneSignal
class YourAppClass : Application() {
override fun onCreate() {
super.onCreate()
// Remote this: OneSignal Initialization
OneSignal.startInit(this)
.inFocusDisplaying(OneSignal.OSInFocusDisplayOption.Notification)
.unsubscribeWhenNotificationsAreDisabled(true)
.init()
}
}Also remove any other code that calls the OneSignal library within your entire app's codebase.
Step 3. Enter your Firebase credentials into WonderPush
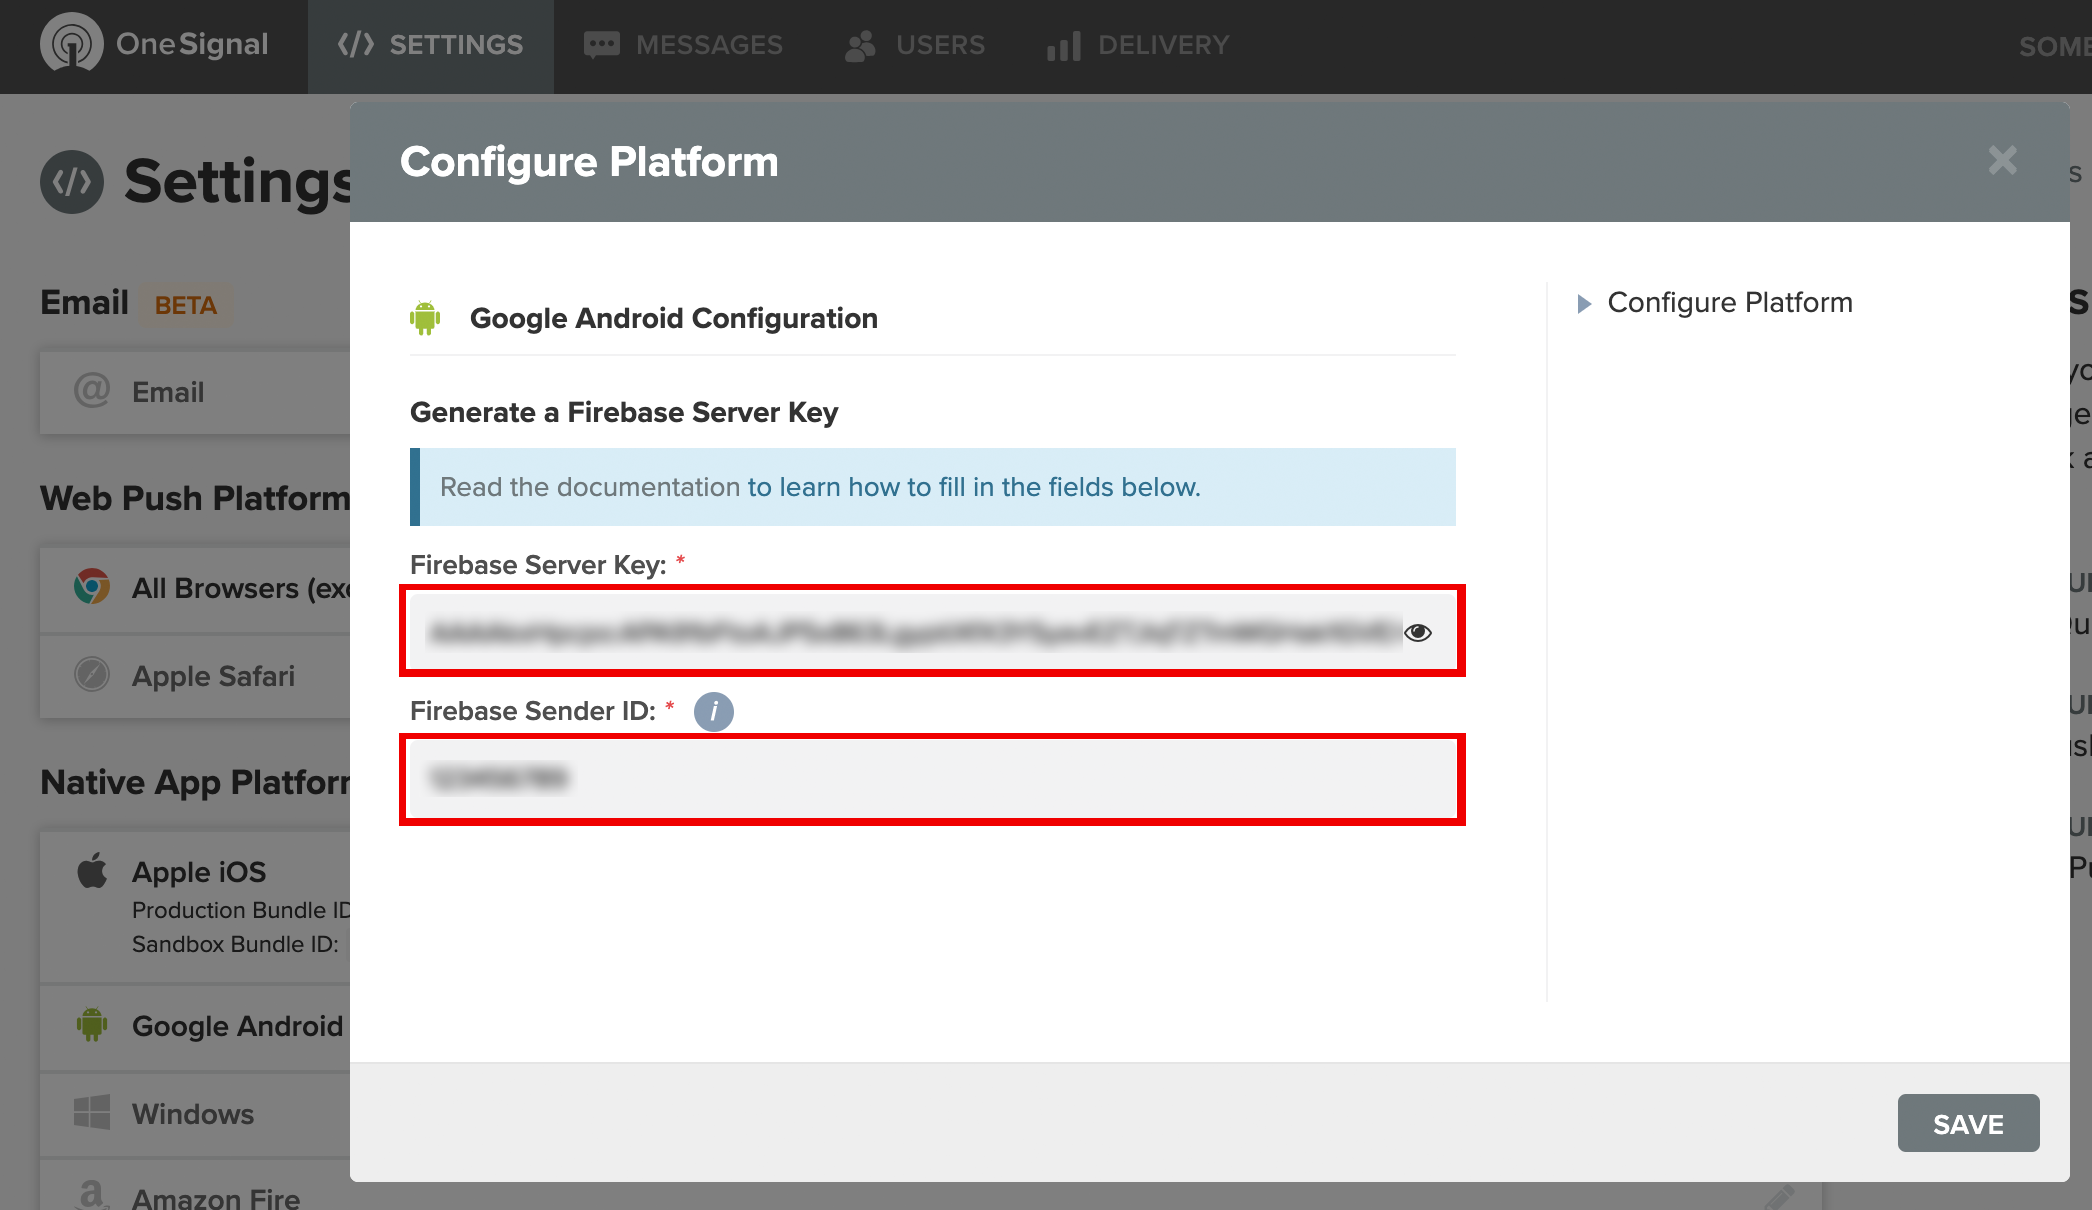
Find your Firebase credentials on the OneSignal dashboard by going to Settings / Google Android. Take note of the Firebase Sender ID, we'll use it later when we add WonderPush to your app.

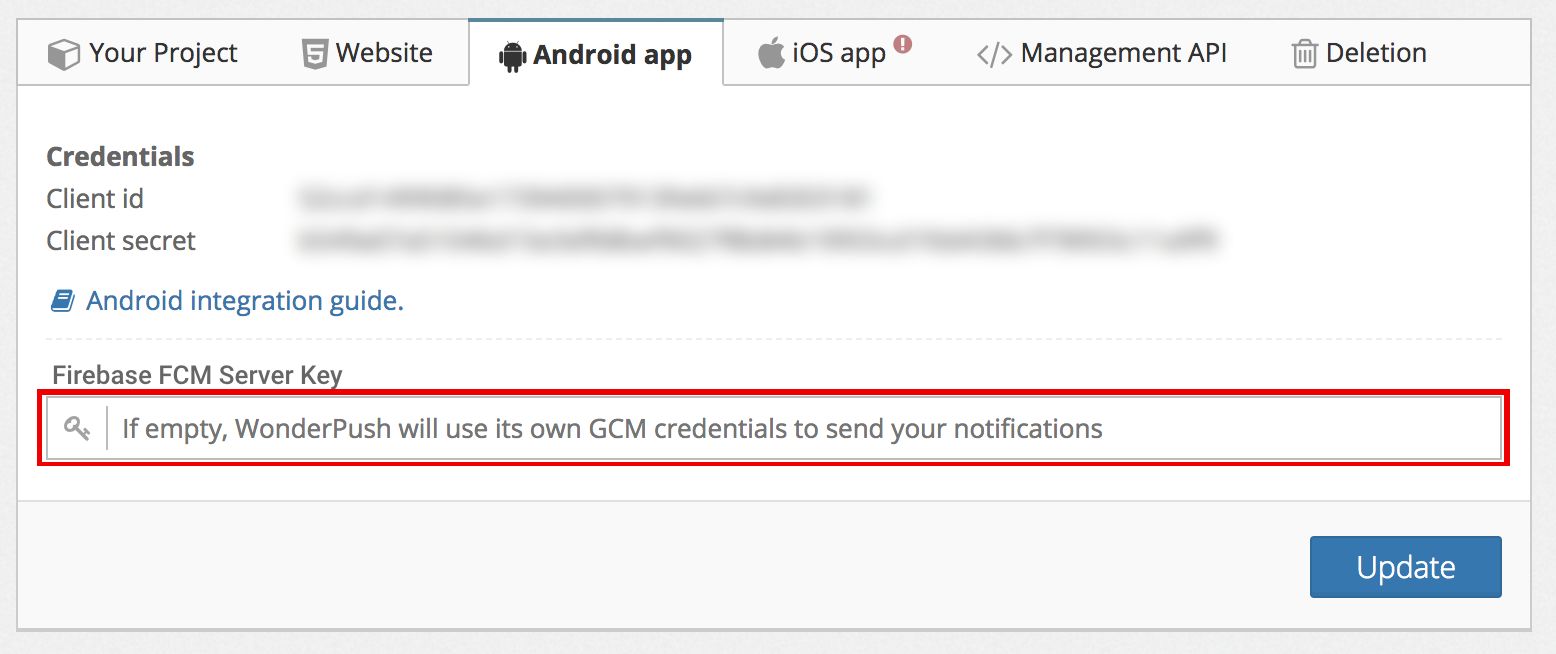
Go to your WonderPush dashboard in Settings / Configuration / Android app and enter the Firebase Server Key from OneSignal in the Firebase FCM Server Key field:

Step 4. Add WonderPush
Follow our Android Quickstart guide to add WonderPush to your app.
The Firebase sender ID mentioned in the Android Quickstart guide is the one you've noted in Step 3 of the present document. You should skip the step where you fill the Firebase credentials in the dashboard, as we've already done it in Step 3.
Once you've got WonderPush in your app, publish a new version. Users that update their app will automatically appear in your WonderPush dashboard.
That's it!Once you publish this new version of your app, users will start to show up automatically in your WonderPush dashboard.
Updated 6 months ago
