Segments
List, create and edit segments directly from the online dashboard.
Not familiar with Segmentation?Read our Segmentation Overview.
Segments page
The Segments page displays the list of all segments configured in your project. This list includes build-in segments as well as your own segments.
Access this page on your dashboard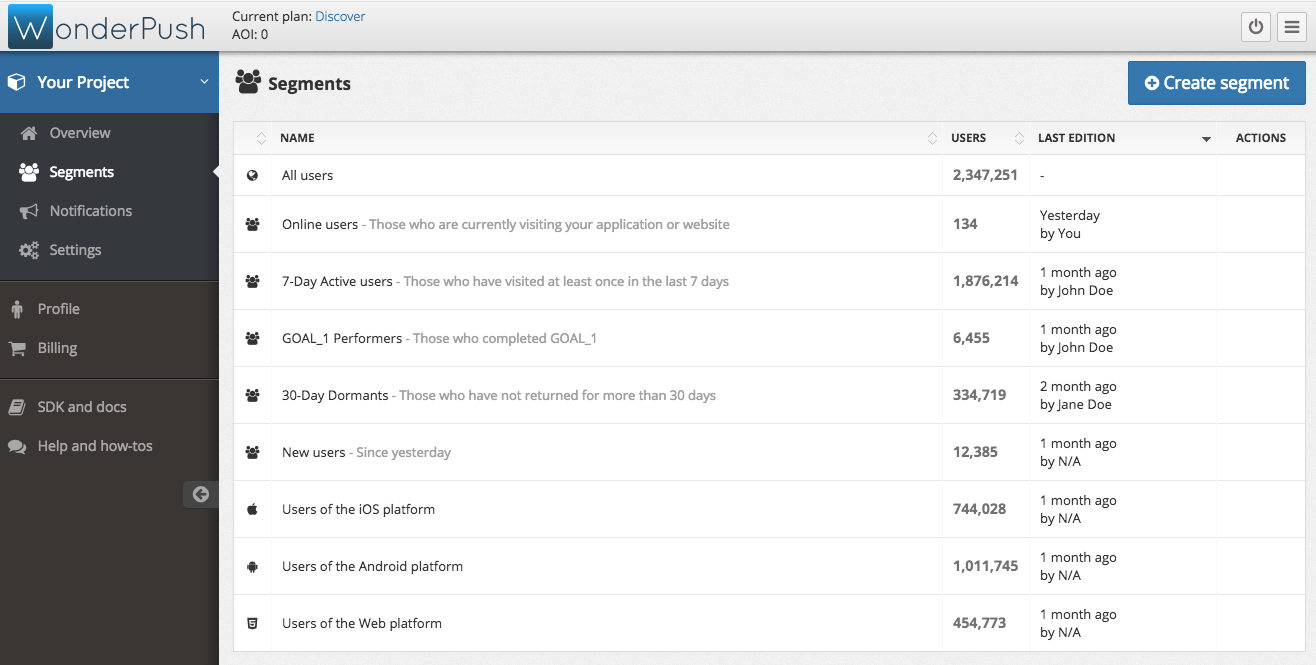
Hovering the mouse over a segment reveals controls that allow you to edit the segment or delete it.

Some built-in segments such as All users cannot be edited or deleted.
Clicking on a segment leads to the Segment detail page below.
Segment detail page
The segment detail page contains important information about a segment, including:
- the identifier of the segment, which can be used to target this segment via the REST API,
- the criteria required for users to enter this segment,
- some analytics including:
- the segment share of the entire audience,
- the ratio of notifiable users within that segment,
- the list of installations in that segment
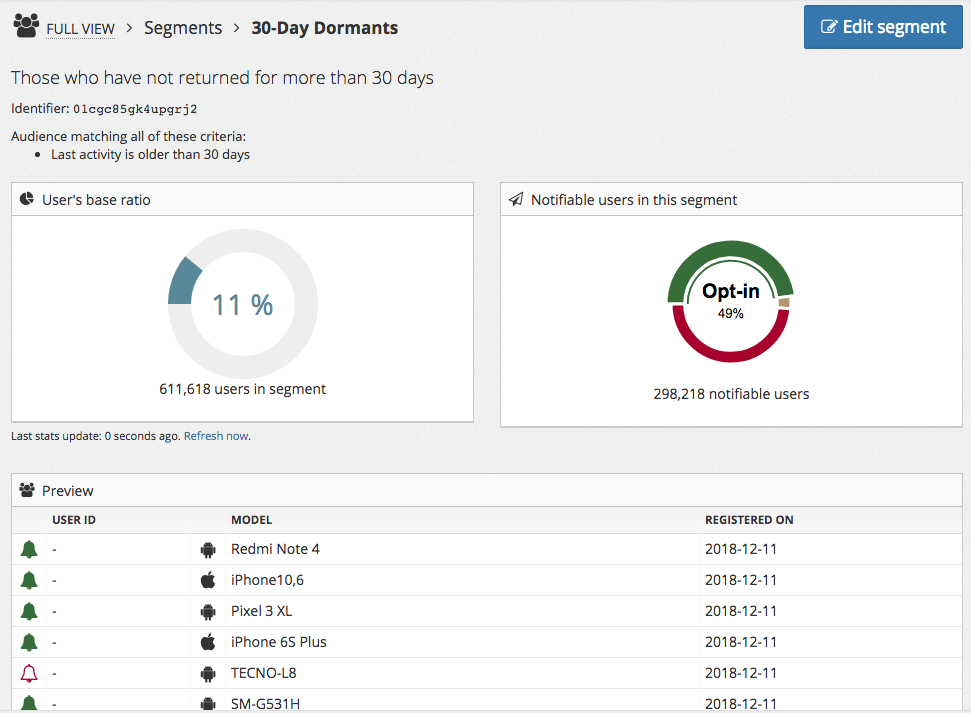
To edit the segment, click on Edit segment at the top of the page, you'll be taken to the Create / edit segment page below.
You can also click on an installation and get to the Installation detail page.
Create / edit segment page
The segment edition and creation page lets you manipulate segments and specify:
- the name of the segment,
- an optional description,
- an identifier if you're creating the segment (it is displayed read-only otherwise),
- a set of rules that users must match to be part of the segment.
- an optional map to target a location.
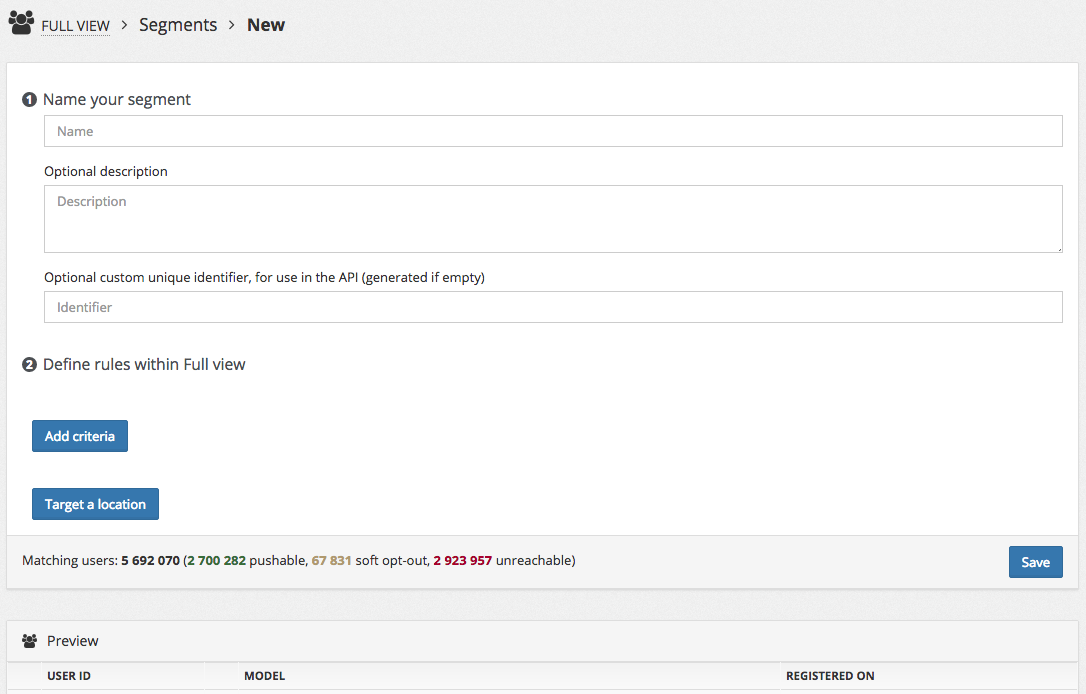
Specifying segment rules
By default, the ruleset of a segment is empty and the segment matches the entire audience. Adding a rule is done by clicking on the Add criteria button.
Each rule has its own form. The first element of the form is always a dropdown menu used to specify the rule type.

The rule type.
You can add as many rules as needed. There are 2 ways to combine rules:
- with the AND operator: all rules must match for the user to enter the segment,
- with the OR operator: at least one rule must match for the user to enter the segment.
You can switch from one way to the other using the combination selector that appears after you add a second rule:

For a detailed list of segmentation options, refer to the Segmentation reference.
Targeting a location
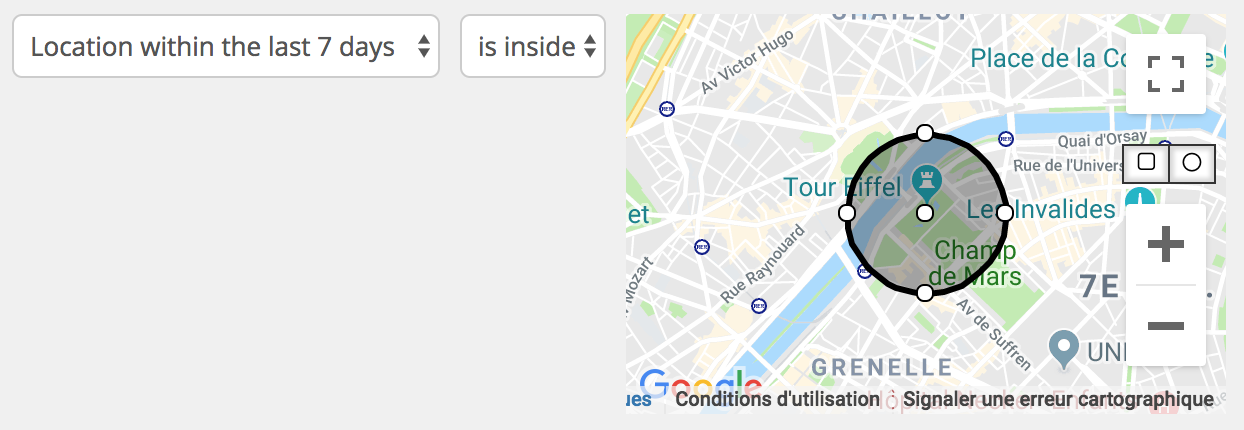
To target a location, click the Target a location button. This will display a map and a form that can be used to:
- set the radius and the center of the zone to target by using the map controls
- set how recently must the user have been in the specified zone to be included in the segment.
Installation detail page
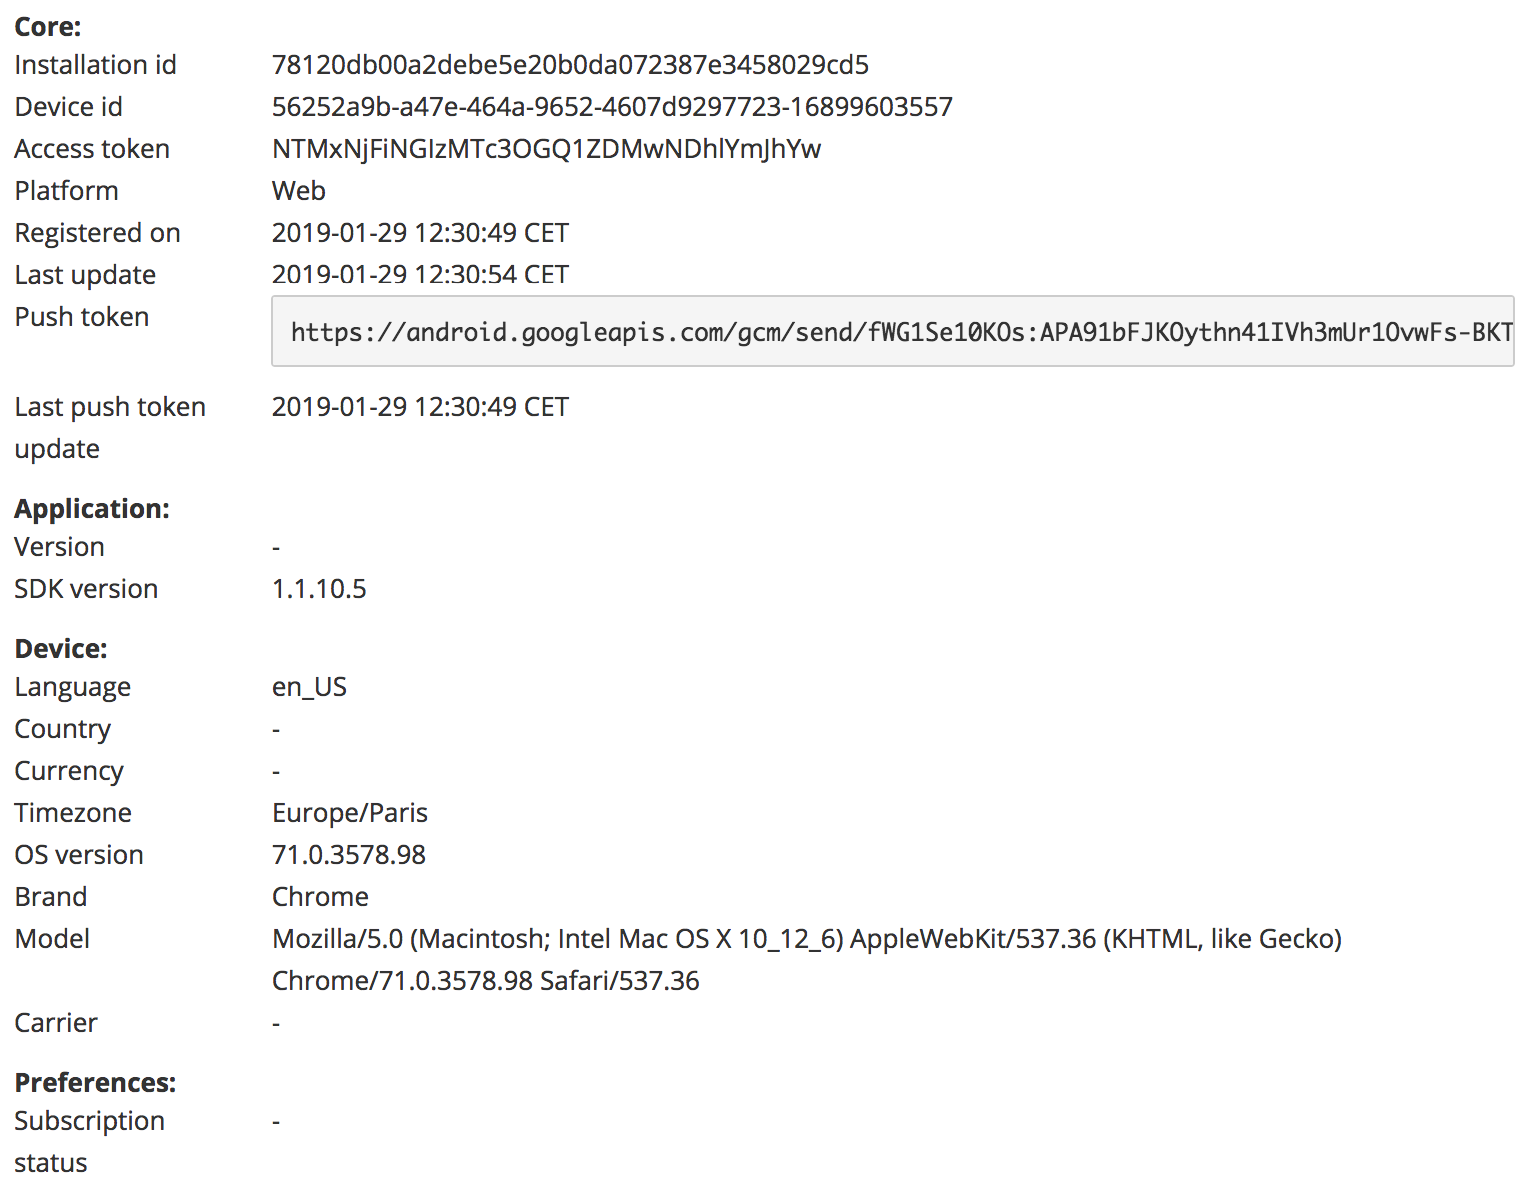
The installation detail page presents all the data related to a given installation.
General information
The first section contains all the data that WonderPush collects natively. This includes the different identifiers, dates, versions and device detail:
Properties
The second section contains all the properties you have set using one of our SDKs putProperties method. In this example, the name of the user has been set under the string_name property. For more information on how to set properties, refer to the Properties documentation.

Events
Finally, the last section lists events that occurred for this installation. Please note that WonderPush only keeps track of the last occurrence of each event type. In the following example, we can see the user sign up (the built-in @OPT_IN event) and make a purchase (your own purchase event). For ore information on how to track events, refer to the Events documentation.

Updated 7 months ago
