
Event-based automation
Send push notifications automatically when subscribers perform certain events
Not familiar with Segmentation? Read our Segmentation Overview.
What is event-based automation?
It is a feature that lets you automatically trigger notifications when users perform certain actions. For example, you could:
- send a "Thank you" push notification 15 minutes after users make a purchase,
- send a cart reminder push notification to users who haven't purchased the contents of their shopping cart,
- send a promo code push notification to users who haven't added products to their cart.
How does event-based automation work?
Setup event-based automation from the push notification editor by choosing the trigger “When a subscriber performs an event”, and specifying a mandatory event name:
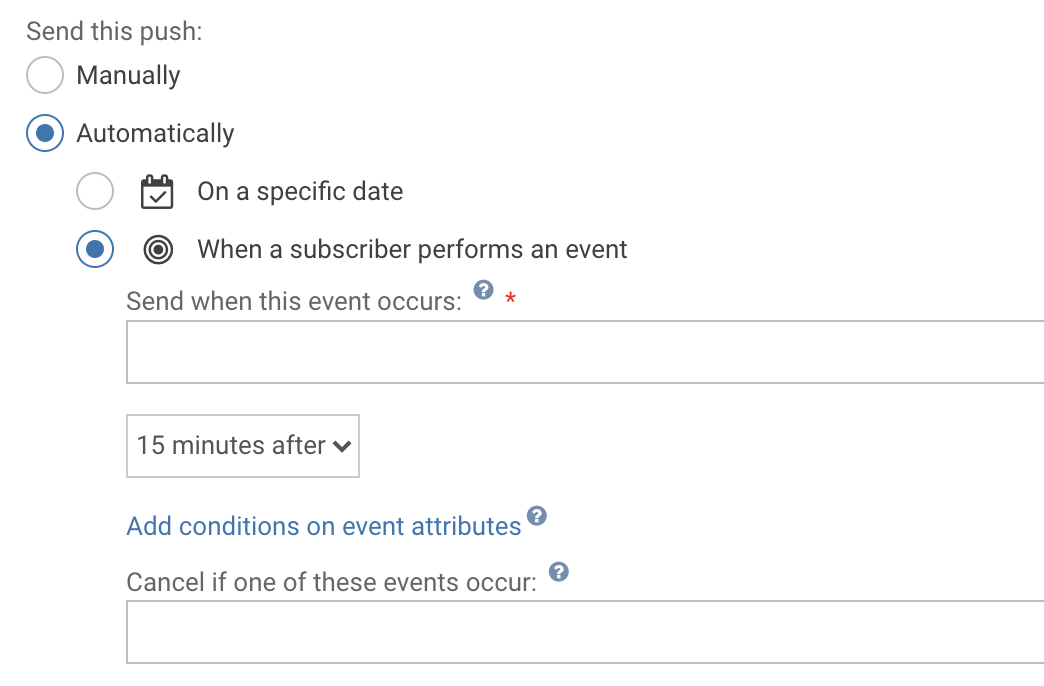
Optionally you can specify:
- A delay after which the notification is sent.
- One or more cancellation events. When a cancellation event occurs after the trigger event and before the delay runs out, the notification is cancelled.
It is also possible to add conditions on the event attributes.
To sum things up, event-based automation works like this:

Example: a thank-you notification for users that make a purchase.
In this example, we'll be sending a thank-you notification 15 minutes after users make a purchase, unless they cancel it.
You will need to track both the purchase event and the cancel-purchase event at the appropriate time. This can be achieved by calling the trackEvent method of our SDK at the appropriate time. This is explained in our Events guide.
Once this is out of the way, create a new notification with the contents of your choice:

Leave the in-app and Audience sections alone and head over to the Scheduling section. Choose to send the push Automatically, When a subscriber performs an event:

Give your campaign a name, enter the name of your purchase event, choose 15 minutes or any other delay you find appropriate and specify your cancel-purchase event as the cancellation event.
Hit save and activate your notification.
Bonus: personalize the content of the notification based on the data sent along with the event.
If you are tracking additional event data like this:
WonderPush.trackEvent('purchase', {string_productName: 'T-shirt'})You can access the event data from liquid to personalize the notification content via the event.custom variable like this:
Thank you for purchasing a {{ event.custom.string_productName }}!
That's it, your thank-you notification is ready