
Defining a test segment
How to define a test segment for internal testing purposes
This document explain how to create a test segment and add your own device / browser to it in order to test your campaigns.
Step 1. Defining the test segment
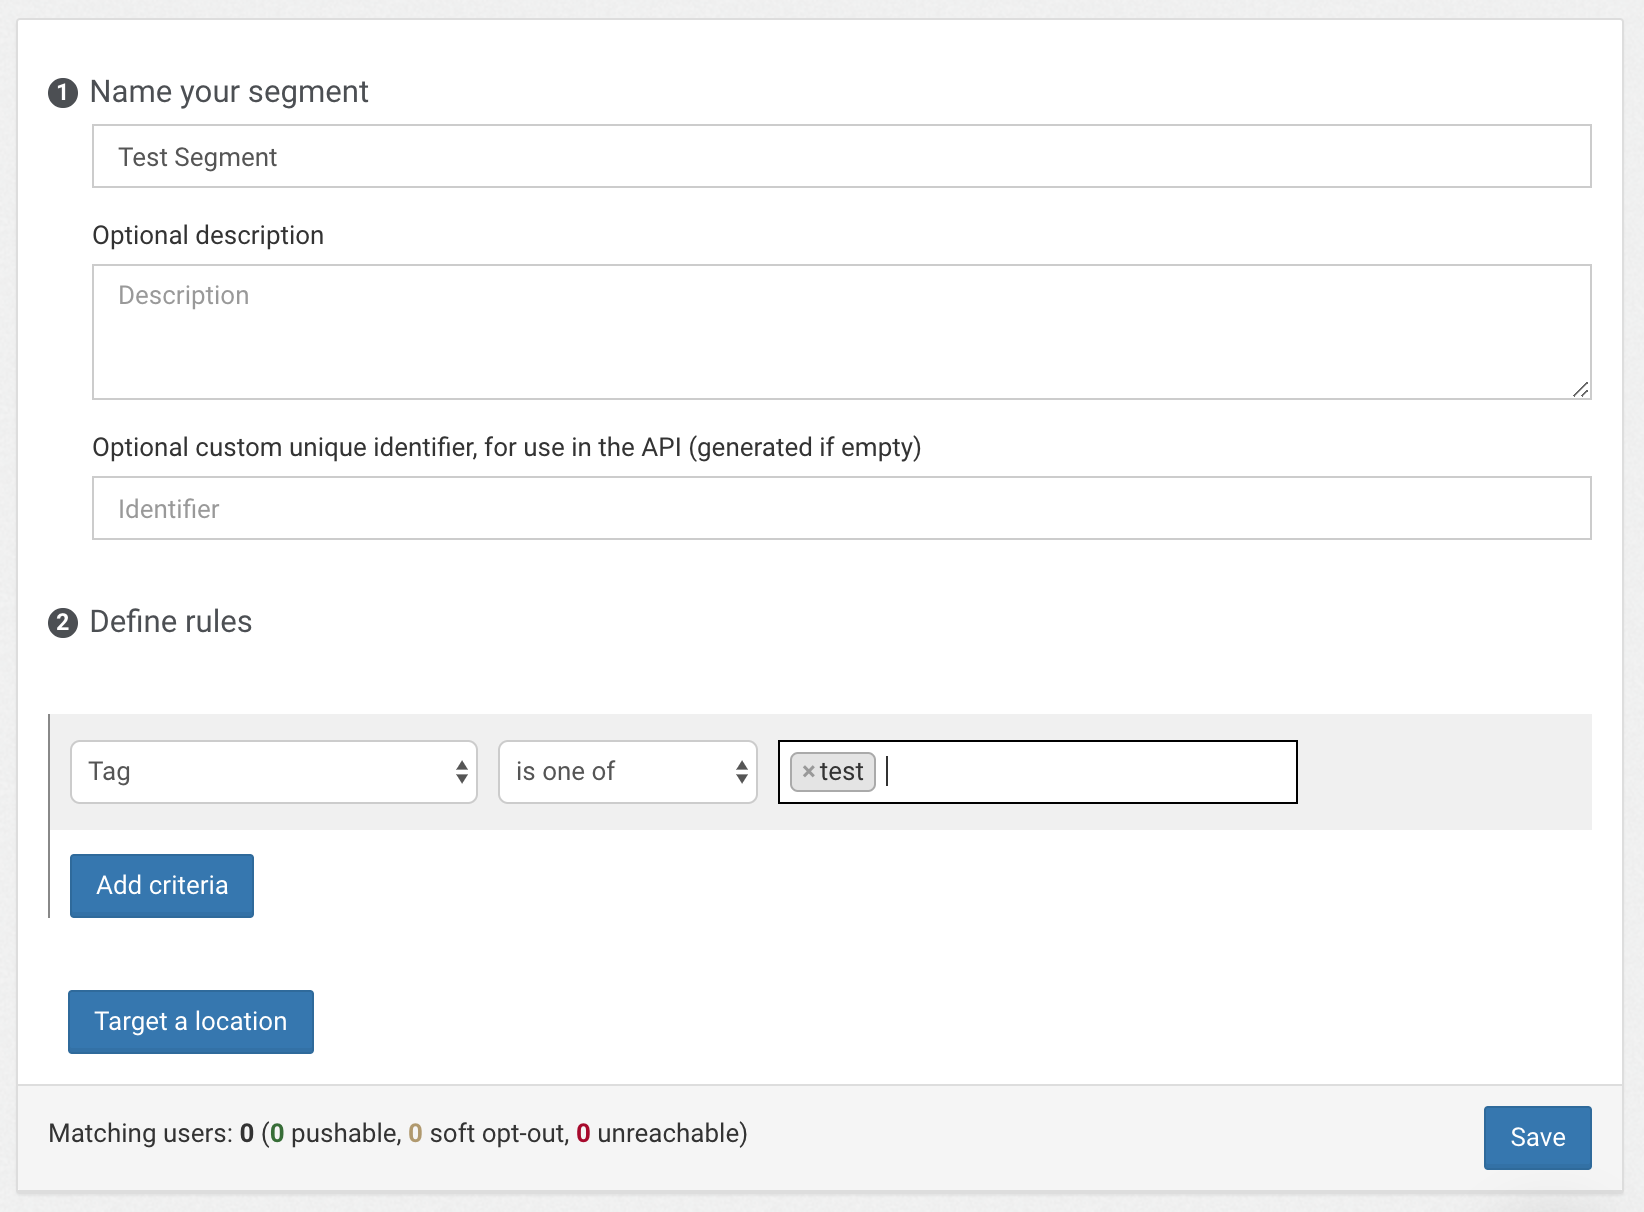
To define the test segment, go to your Dashboard and choose Segments then click Create Segment. Name the new segment Test Segment and set up the following criteria:
- Tag, is one of, test.
Step 2. Add your device / browser to the test segment
When you know your installation ID
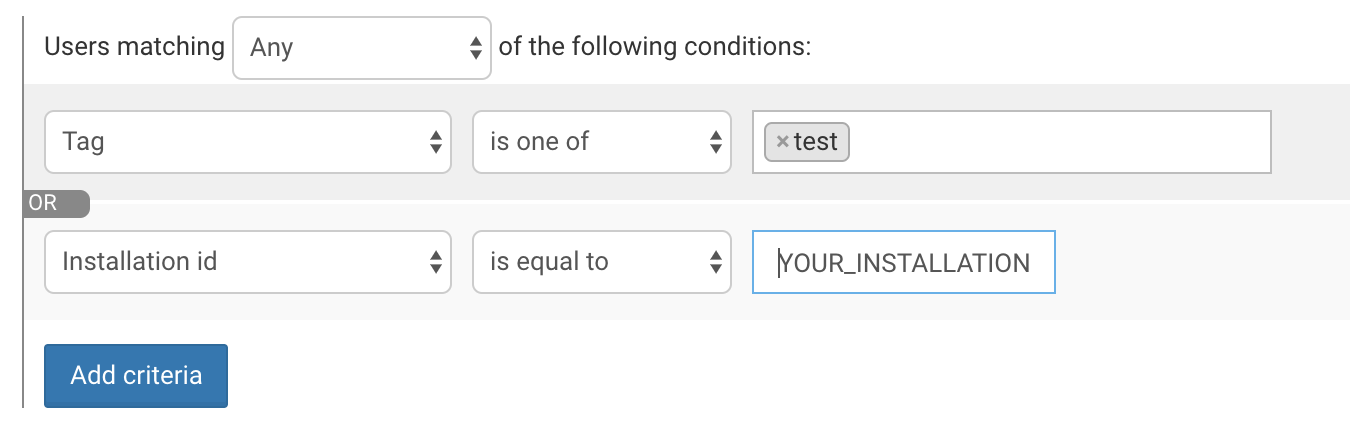
If you've already subscribed to notifications and know your installation ID, you can modify your segment to directly include your installation like this:
- click "Add criteria"
- make sure you're matching users with Any of the following criteria
- choose Installation id, is equal to
- enter your installation ID
- save.
Websites
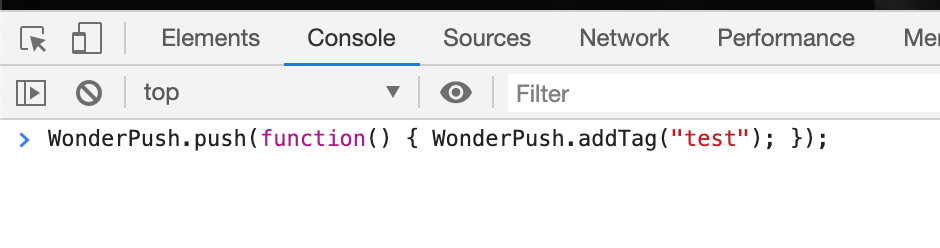
If you do not know your installation ID, visit your website and make sure to subscribe to push notifications. In your web browser, open the Developer tools (here's how to do that for Firefox and Chrome) and paste the following script in the console:
window.WonderPush = window.WonderPush || [];
WonderPush.push(function() { WonderPush.addTag("test"); });
Here's how it looks on Google Chrome:
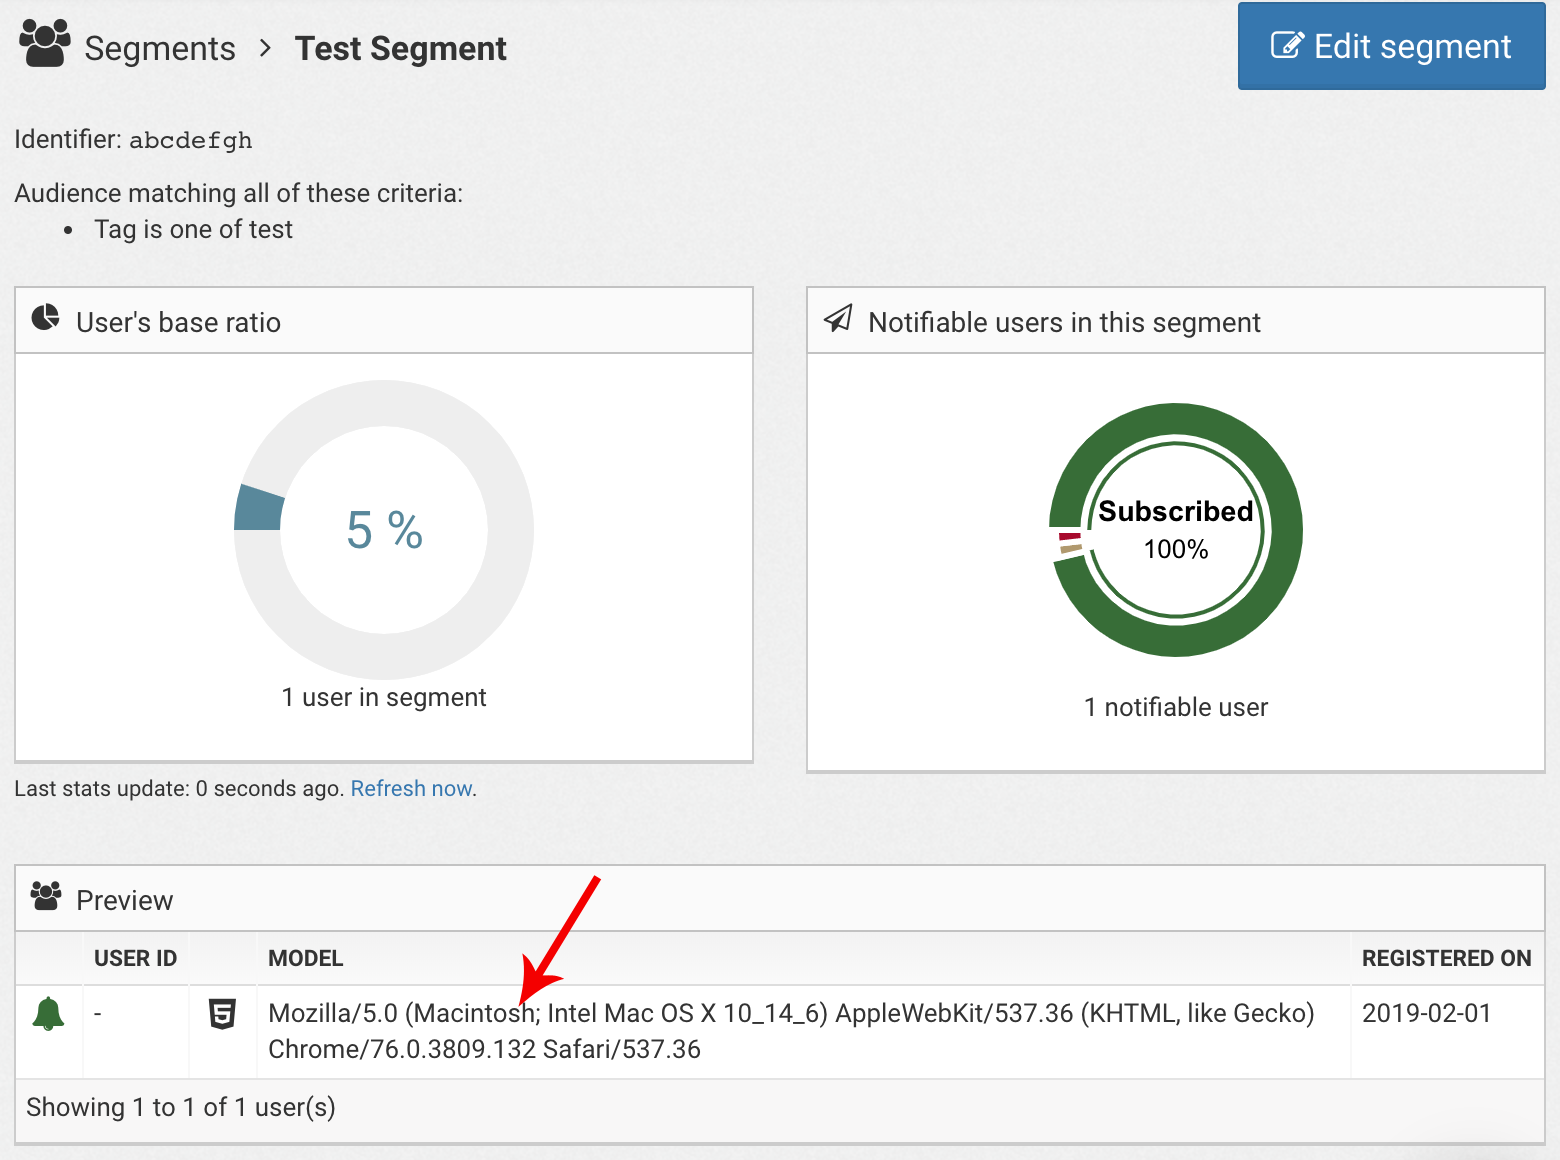
That's it! Go back to the segment you created earlier and make sure your installation is now a part of it.
Mobile apps
For mobile applications, if you do not know your installation ID you'll need to modify the app itself in order to add a secret button or gesture that executes the following code:
WonderPush.addTag("test");WonderPush.addTag("test")[WonderPush addTag:@"test"];WonderPush.addTag("test");You then need to build your application, run it on your device, subscribe to push notifications and press the button.
That's it! Go back to the segment you created earlier and make sure your installation is now a part of it.

Updated about 1 year ago