
Subscribe to WordPress Categories
Let your site visitor declare their interests in your categories and create segments based on these categories
In this guide, we'll show you how to add switches that let your visitors subscribe to push notifications and declare their interest for one or more categories of your WordPress site.
This guide is for WordPress users. If you have another kind of site, we've put together a more general guide named Subscribe to topics.
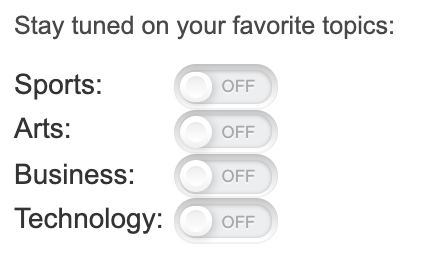
Letting users subscribe to topics is a powerful way to both acquire new push subscribers and target them efficiently. WonderPush provides a very simple way to create user interfaces similar to this:
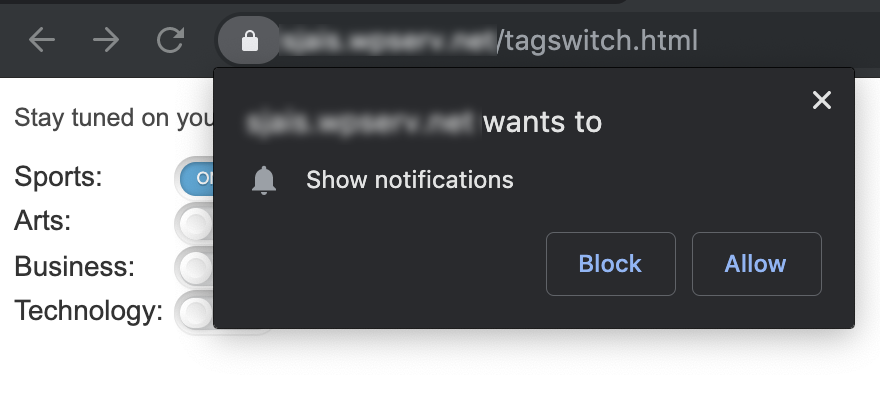
When users activate a switch, here's what happens:
- if they are not subscribed to push notifications, they will by prompted to subscribe,
- if they are subscribed, their data on WonderPush will simply be updated.
Here's what the subscription looks like:
Step 1. Adding the required HTML
To add a topic switch, all you need is to add a little bit of HTML within your page / post.
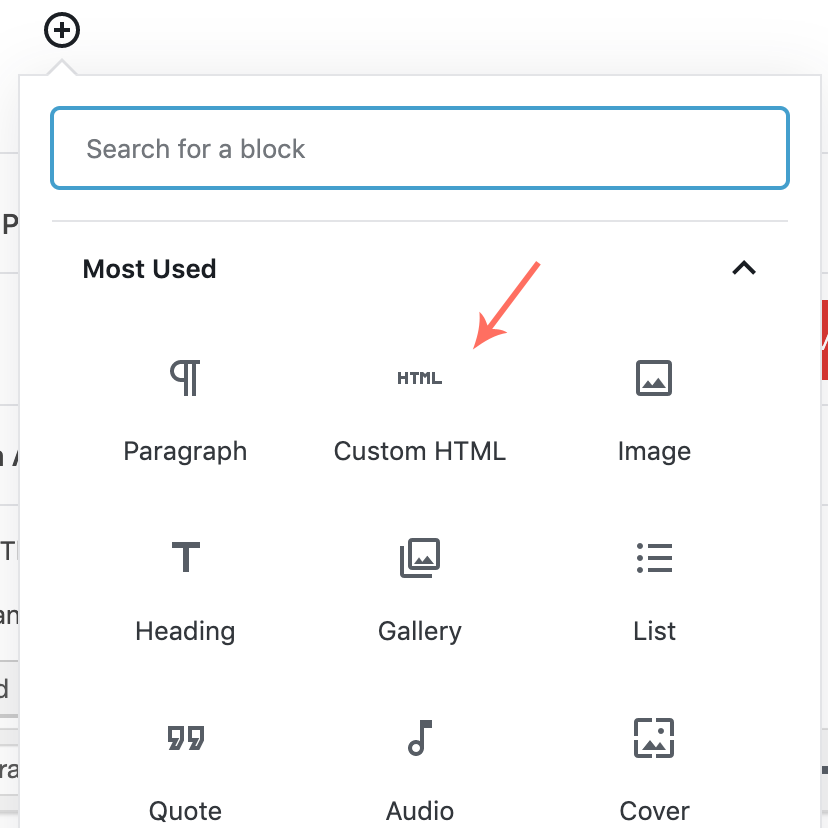
In your page / post add a Custom HTML block, like this:
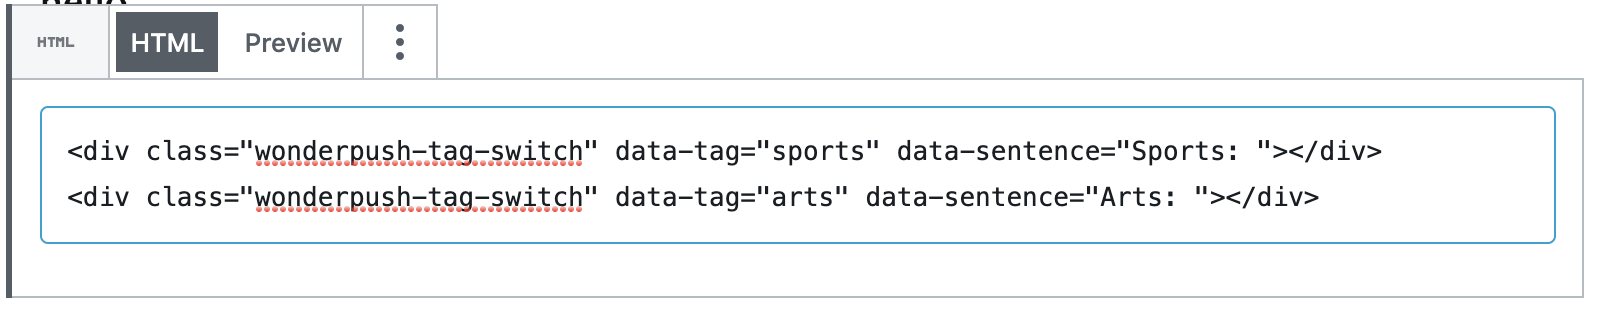
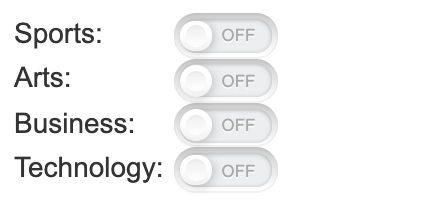
To add multiple switches for Sports, Arts, Business and Technology, input the following HTML:
<div class="wonderpush-tag-switch" data-tag="sports" data-sentence="Sports: "></div>
<div class="wonderpush-tag-switch" data-tag="arts" data-sentence="Arts: "></div>
<div class="wonderpush-tag-switch" data-tag="business" data-sentence="Business: "></div>
<div class="wonderpush-tag-switch" data-tag="technology" data-sentence="Technology: "></div>
Save your post / page and click the "Preview" button, you should see something like this:
The complete reference of customization options for the tag switch is available in the Website SDK reference.
This technique uses the new WordPress Gutenberg editor. You can also add custom HTML by editing your WordPress theme, although this technique requires more advanced skills.
Step 2. Testing your changes
It's time to test your changes:
- go to your web page and click on a switch,
- make sure you are prompted to subscribe to push notifications if you haven't already
- activate one or more switches.
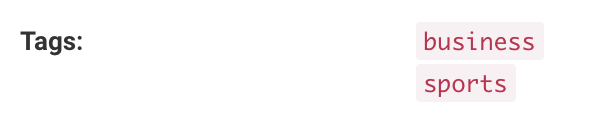
Go to your dashboard and find your installation in Segments / All users, make the right tags have been added to your installation:
Step 3. Creating segments to target users
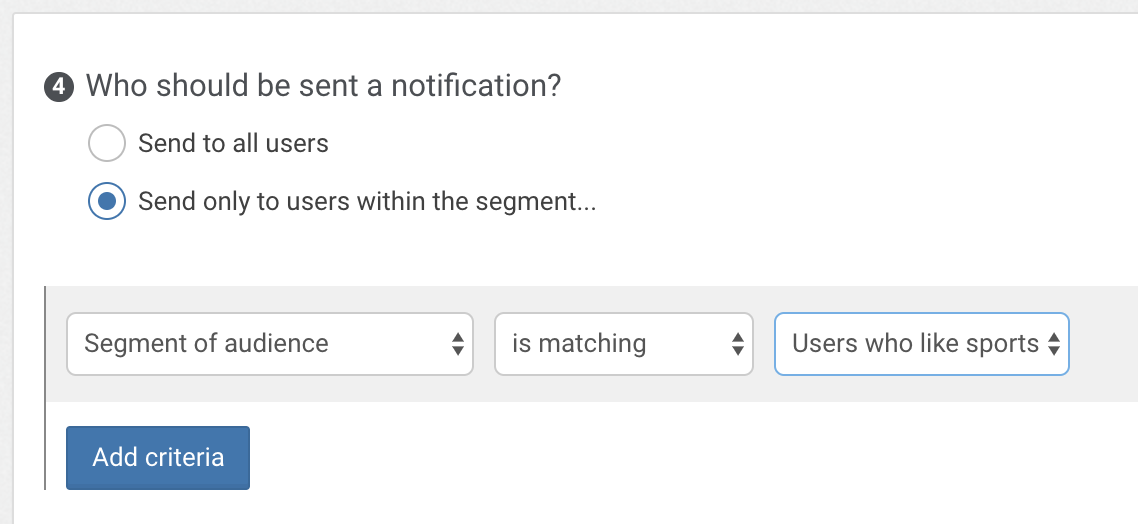
We're now going to create a segment to target users that have checked the sports switch. In your dashboard go to Segments and click Create segment.
Create a new segment with the following data:

That's it! Now all you have to do to reach users who like sports is create a new notification with the following audience:
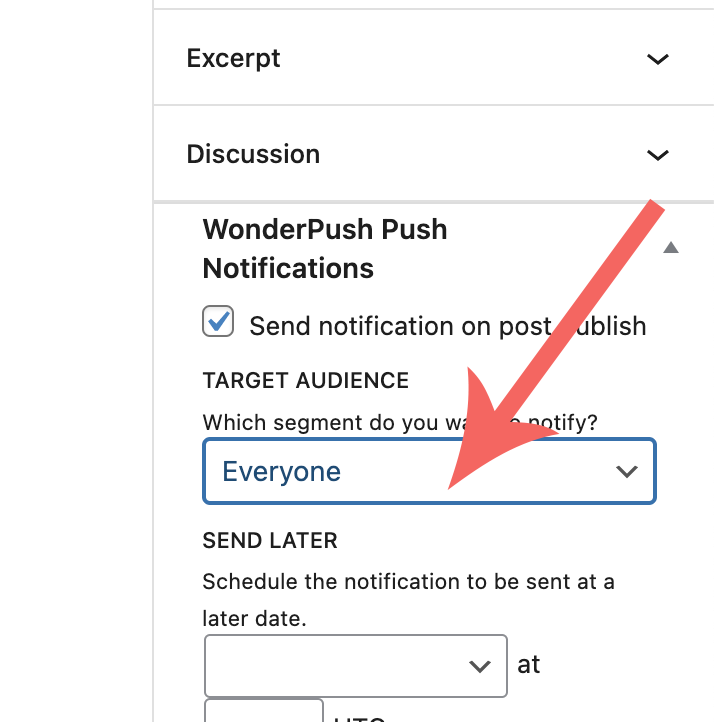
Step 4. Select the audience from the WordPress editor
You can now select the right audience directly from your WordPress editor
You're all set!
Updated 12 months ago