Multidomain website integration
How to manage a multi-domain website?
Thanks to WonderPush, you can manage, if you wish, your different websites within a single project. Thus, all your subscribers are assembled within the same dashboard, which allows you to push them globally or specifically according to your needs.
This ensures a native opt-in user experience on all domains, but it will treat each domains as a completely separate website. So if a user has opted-in to yoursite.com, he won’t be opt-in to yoursite.co.uk, and opting in to the latter will create 2 separate pushable installations, both inside the sameproject. You’ll want to properly tag your users to be able to differenciate them later-on, and probably avoid project-wide broadcast communication.We call it multi-domain, and requires a bit of additional integration.
1. Host the 2 files required for HTTPS integration on every domain
Host both files at the root of each website you want to integrate into your project, as it is explained here.
2. Fill the customDomain on each website
The following snippet replaces the one from step 3 of the classic integration.
<script src="https://cdn.by.wonderpush.com/sdk/1.1/wonderpush-loader.min.js" async></script>
<script>
  window.WonderPush = window.WonderPush || [];
  WonderPush.push(["init", {
    customDomain: "https://es.yourwebsite.com",
    webKey: "yourwebkey",
  }]);
</script>
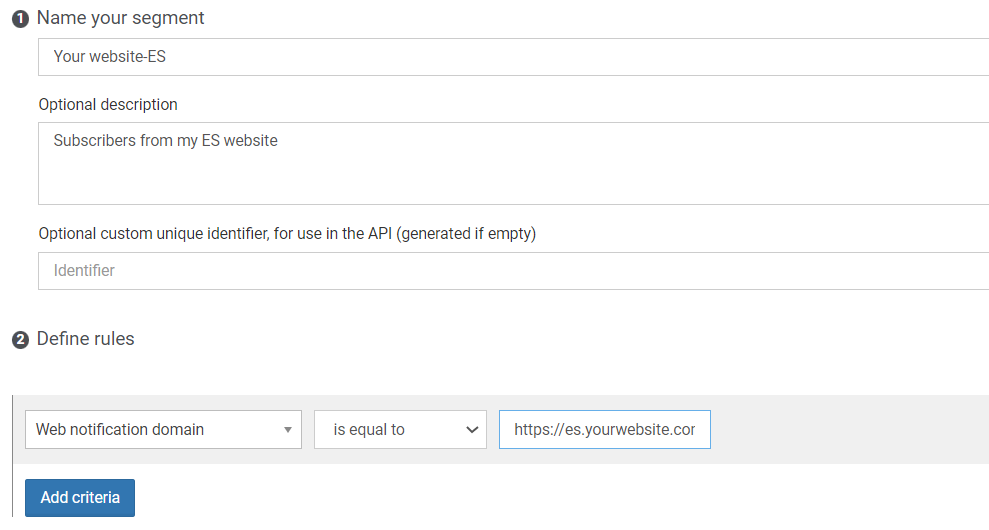
3. Create a segment for each customDomain
Access the segments page and create a new one.
To do this, you will use the Web notification domain segmentation criterion which will have the exact value of the custom domain as you defined it in the snippet in the previous step, with no path (nothing after the typical .com).

4. Target a customDomain only
You can decide to send your push or display a popup to all your subscribers regardless of the domain on which they registered or you can decide to target only subscribers from a custom domain.

Updated 8 months ago
