
Composing Popups
A guide to creating beautiful and efficient popups (formerly known as In-app messaging)
Getting started with in-app messaging is easyRead our guide Getting started with Popups
In this guide, you will learn to:
Composing popups is easy and achieved directly from our online dashboard, no coding is necessary.
Step 1. Compose your popup
First, click the Create a new popup button from the Popups page to access the creation form:

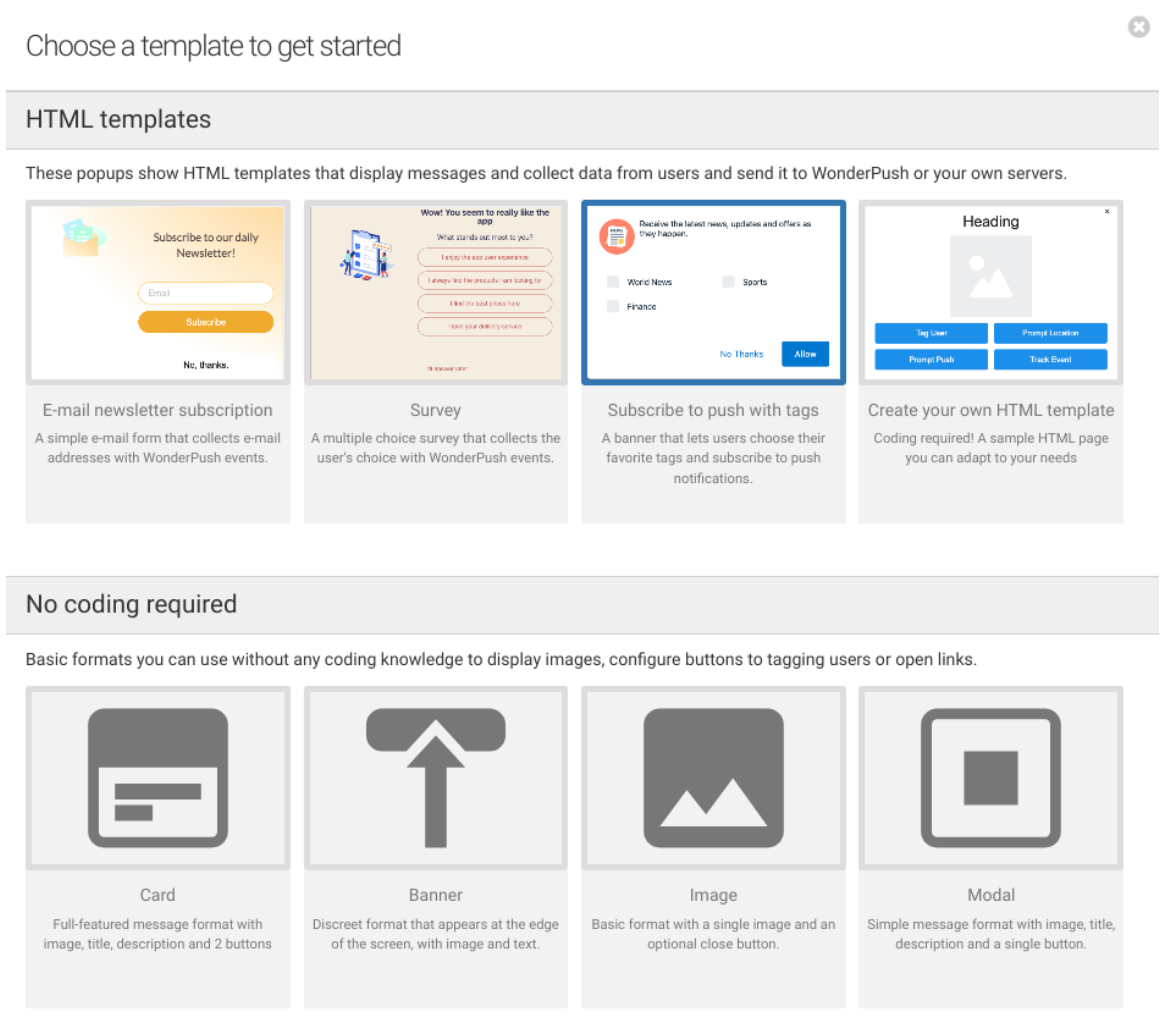
Two large families of popups are available to you:
HTML templates
This section gathers HTML popup templates, which can be customized at will. But this requires more or less advanced HTML skills depending on the desired goal.
No coding required formats
This section gathers popups that you can use without any coding knowledge to display images, configure buttons to tagging users or open links.
Card
With cards, you can add a title, a short text, an image and up to 2 buttons. Ideal for binary choices.
Modal
Modals let you display a title, a short text, an image and a single button. Ideal for alerts with a single choice.
Image
This format lets you display a clickable image. Gives you complete control over the look and feel.
Banner
Banners let you display a title, a short text and an icon. Banners are automatically dismissed after some time and can be attached to the top or the bottom of the screen.
Formats comparison chart
| Format | Title | Text | Text color | Background color | Image | Action button | Secondary button | Entry/Exit Animations | Deeplinks | Auto-dismiss |
|---|---|---|---|---|---|---|---|---|---|---|
| Card | ✓ | ✓ | ✓ | ✓ | ✓ | ✓ | ✓ | ✓ | ✓ | |
| Modal | ✓ | ✓ | ✓ | ✓ | ✓ | ✓ | ✓ | ✓ | ||
| Banner | ✓ | ✓ | ✓ | ✓ | ✓ | ✓ | ✓ | ✓ | ||
| Image only | ✓ | ✓ | ✓ |
Previewing your changes
Popups adapt their rendering to the user's device, with specific support for mobile phones, tablets and computers.
As you compose your popup, the preview on the right hand-side of your screen will automatically update to reflect your changes.
Use the device selector at the top of the preview to switch from phone to tablet or computer.
Customizing the display of your popup
You have complete control over how your popup looks. The popup composition form offers many color and placement options, buttons, as well as entry & exit animations.
Developers can go beyond and handle the display themselves.
There is a complete guide to customizing the display of your popup message for marketers and developers.
Handling clicks
Whenever a click occurs, you can execute different kind of actions such as prompting for push subscription or setting a tag. It's detailed here.
Step 2. Target your audience
Choosing who will see your in-app is key to its success. To choose the audience of your in-app, you use Segmentation.
Popups and push notifications use the same segmentation to target an audience, so it's easy to combine push and popups to reach the same audience
By default, popups are viewed by 100% of your audience. To target users with your popups, use segmentation criteria by clicking the Add criteria button.

In this example, we target only Android and Web users, leaving iOS users out and reaching an estimated 7% of our total audience.
Segmentation is essential to selecting the right audience and it is documented in detail:
You can create segmentation criteria based your own data, collected as Tags, Properties and Events.
Step 3. Schedule when it must be shown
Choosing when the popup appears in the user experience is also essential to its success. We give you the tools to let you display popups at exactly the right moment.
Specify start & end dates
By default, your popup will run indefinitely when activated. With the start and end dates setting you can control when your popup starts appearing and when it stops.

In this example, the in-app will start appearing immediately once activated, until Jan. 13th 2021 at 18:29 CEST.
Specify a trigger event
Popups are always displayed after the user has taken the action you decide.

So you can trigger the display of an popup:
When visitor opens your website or application. That is when the user first opens your app or visits your website after a period of inactivity.When visitor performs specific event. That is after any custom event tracked by your app or website using our SDK'strackEventmethod, like apurchaseevent on a merchant app or website.When visitor visits specific URLs. Choose URLs containing specific patterns.When visitor is about to leave. TheExit pageevent occurs only on websites, never in mobile apps. It occurs every time the user's mouse leaves the page.
Capping
By default, popups are capped to be displayed only once to the user.
You can decide to show a popup more than once to the same user. In this case, we recommend setting the Time between impressions to avoid getting the same message twice in a row.

In this example, the in-app will be displayed at most twice to the same user, with at least 1 hour between both impressions.
Step 4. Save and activate
To save your changes, hit the Save button at the bottom of the popup composition page. By default, popups are not active, which means nobody will see them.
To activate an popup, hit the activation button of your popup in the list of popups
Congratulations, your popup is now live!
Updated about 1 year ago